Loading Incident Data- SQL Server
Before you load any incident data you will need to create a SQL database containing the Workload Modeller Add-in table structure:
On SQL Server, you will be connected to the where you can create a new empty set of Workload Modeller tables in a schema in a database.
Create a New Database
If you have the required permissions, you can create new SQL Server databases and new schemas.
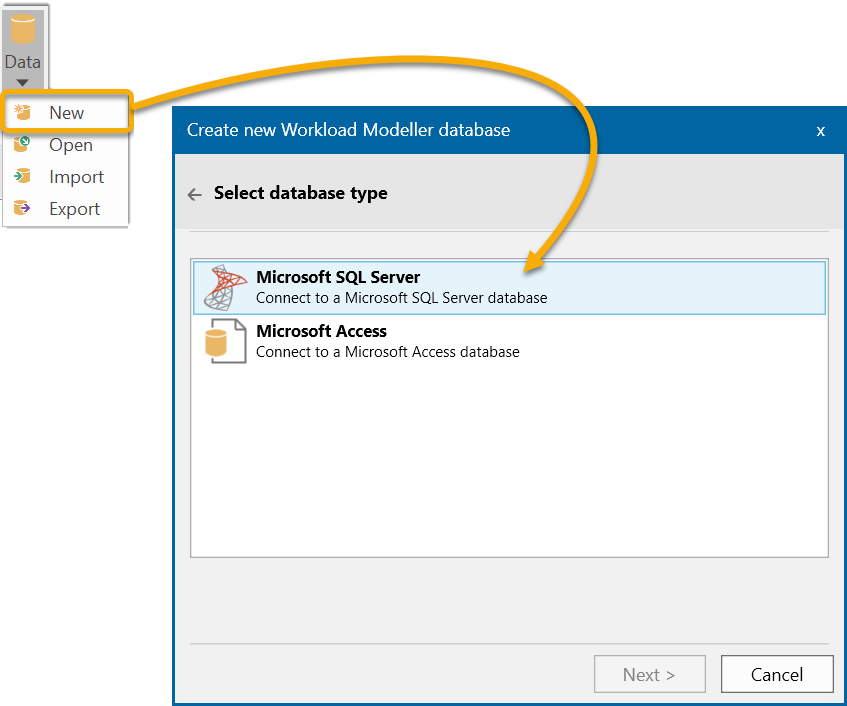
To do this click Data > New and select Microsoft SQL Server. Click Next.
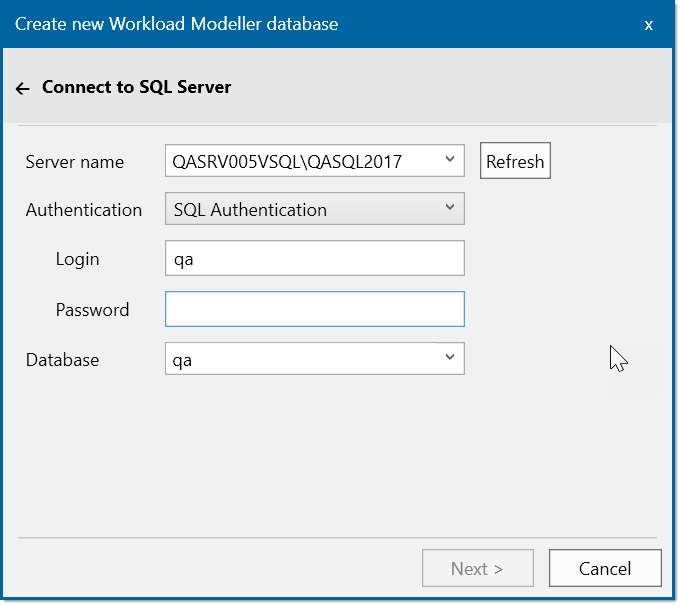
Select the appropriate SQL server from the drop-down menu and enter the correct credentials. Click Next.
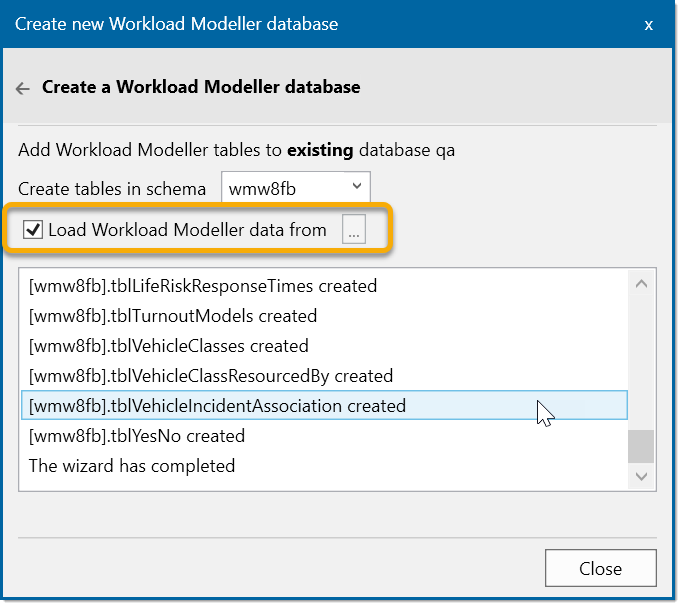
Select the Schema where the tables need to be created.
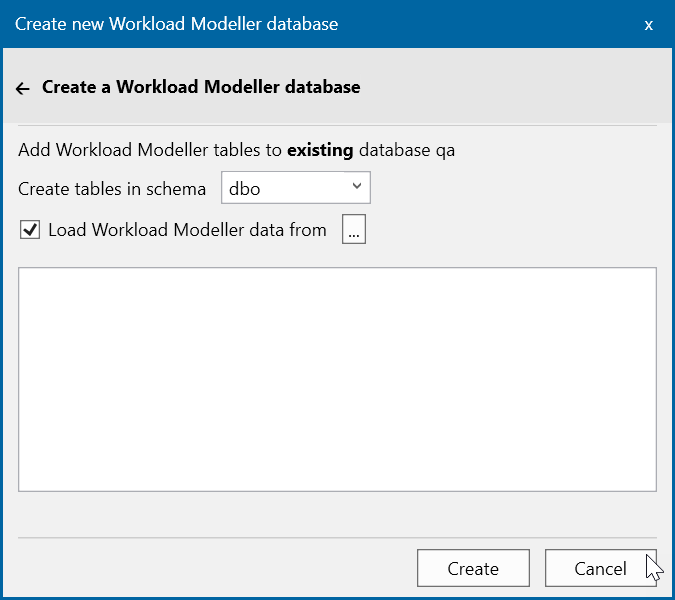
A new set of empty Workload Modeller tables is largely useless! When using Access, DatabaseTemplate.mdb is pre-populated with a base level of customer data and so the tables have some immediate use.
To balance this, as all current customers will have legacy Access databases, SQL Server provides the option to load data from an existing Workload Modeller database.
Click the Browse button  to select an Access file and click Create.

Open another SQL Server Database
To open a different database, click Data > Open: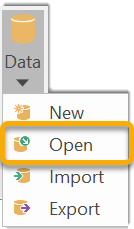
Data Open allows the user to swap to a different Workload Modeller database.
Click Data > to connect to the server and database and then select the required schema.
Note: This menu will list only those schemas in the current database that contain Workload Modeller tables.
Import Incident Data
Next begin loading incident data into the database. Click Data > Import: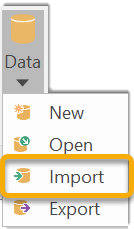
The newly created SQL Server Database will be opened. Navigate to and select the required database.
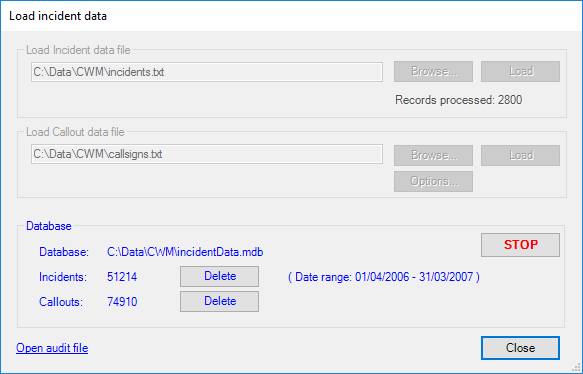
Now use the Data > Import option to open the Load incident data dialog:
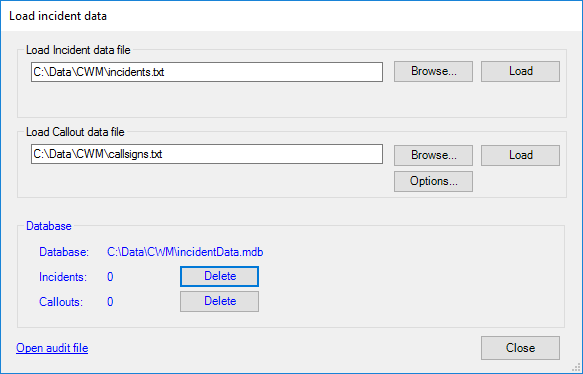
The current database is seen in blue at the bottom of the dialog.
Use the Browse buttons to locate the incidents.txt and callsigns.txt data files; click Load to make the program read the data into the database.
Use the STOP button to stop the load process at any point.
TIP: Incidents and Callsigns data files in either .txt or .csv format can be loaded into the database. The format to be read is defined in the Settings.txt file located in the Workload Modeller installation folder.
The Load option is intended to help easy migration to SQL Server from Access and so it will import records for:
- Bases (Fire stations)
- Vehicle Classes
- Individual Appliances
- Incident codes and categories
- Deployment Rules
- Incident and Callout data
- Attendance targets (for both Life risk and Incident category)
- Named Periods
- Prioritisation Rules
- Shifts
- Staffing systems
- Vehicle – Incident mapping
- Appliance Request Sets
- Resource Sets
- Station Sets
Load will not import output from turnout models run on Access, i.e. tblMO_, tblMR_, tblMA_ and tblMC tables.
Set the following line to txt or csv as required.
DataFileExtension = txt
Use the Delete buttons to delete data in the relevant database tables, i.e. delete incidents.txt or callsigns.txt incident-related records.
The Load incident data dialog can be opened at any time to determine the name of the current database and how many records have been loaded.
Export Incident Data
To export historical data or turnout model results to Excel click Data > Export: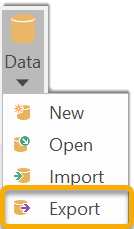
The Export dialog will be displayed:

Select the required Table from the drop-down menu.
Type of export
1. Based on callout details
This is based directly on either the historic callouts table (tblIncidentApplianceAssociation) or the turnout output table (tblMO_model). The output will contain all the columns in those tables, e.g. Assigned, Mobilised, InAttendance, Released, etc.
Note: If a model has been created using a route cost database which includes distances (see Setting up a Stored Route Costs Database) then the output will also include distances.
2. Based on attendance analysis
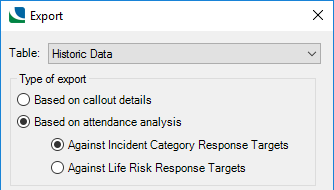
Against Incident Category Response Targets / Against Life Risk Response Targets
- The export is based on the results of an attendance analysis against response targets, i.e. it will contain the same columns as an overlay of Response Target Performance.
- Similar to Attendance Analysis, define whether Incident Category or Life Risk response targets should be used. The last-used option is used as default.
- The export, however, is for the whole of the data set and so there will be three values for BENCHMARK in export: PASS, FAIL and NA. The NA value denotes rows in the export for which there was no applicable performance target.
- Exporting attendance results requires an attendance analysis to be run as part of the export. The command will display an additional progress dialog for this before the export progress dialog is displayed.
Scope of export
Like Routecost calculation, this dialog provides the option to:
- Process the whole dataset (All callouts) or
- Apply currently set filters (Limit to callouts passing current filters).
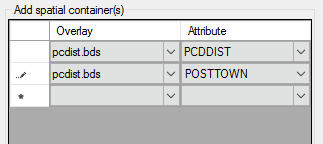
Add spatial container(s)
Schema columns from other visible overlays can be selected as spatial containers.
These are applied as ‘FindContainer’ expressions on the data being exported so it will be possible to include columns in the export (for eg station ground, ward, postcode area, etc.)